Optional key switches (volt-free) are available to be mounted on the MxPro 5 panel fascia plate. These are pre-wired with the appropriate 2-pin connector.
To install a key switch, follow these easy steps:
- Use a sharp knife to cut through the fascia label using the aperture profile as a template.
- Insert the key-switch mechanism and tighten the nut.
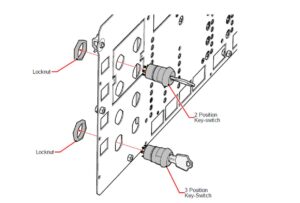
- Route the wiring as shown below and install the plug on the connector for the required switch
input position. The leads are a common length suitable for installation of the switch in any
position.
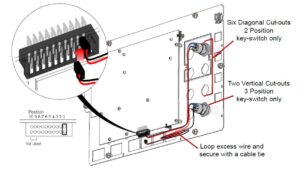
- Fold up any extra cable neatly and apply a tie-wrap to hold in place.
- Use Level 3 panel access or the PC Tool to program the required function for each switch
input. - The fascia label is provided with a slide-in label pocket for a user text description.
- Slide the required insert label into the pocket to provide a description of the switch function.
- A standard access enable insert label is provided with Mxp-511 (key switch control) or we can provide a 'Word' template for printing out customer-specific text labels.